
Outdoor Gazebo Detailed Do-It-Yourself Roofing Guide.
Hi, I am Richard, and I’ll start by showing you a step-by-step guide to installing an outdoor gazebo roof with asphalt shingles.
This installation technique applies to a garden gazebo, patio, pergola, shed, garage or even your home. When we send out this, it comes in an outdoor gazebo kit with all the necessary roofing materials ready to use.
We need to take a few measurements to calculate the materials required for the job. Generally, asphalt shingles come in bundles of 21 pieces, which cover 3 m².
You will need to do the following:
- Calculate the total area of the roof.
- Calculate the total length around the bottom edge.
- Measure the combined total length of the hips and ridge.
Calculation number 1 will determine how many sheets of plywood you will need.
A standard sheet of plywood is 2400mm x 1200mm. One of these sheets is 2.88 m². Generally, you can work with about 10% wastage. It will also show how much asphalt-impregnated roofing felt you would need – Add 10% for wastage. (More on the roofing felt later. It will also give you part of your asphalt shingle requirements.
Calculation number 2 will show you how many meters of starter course and metal drip edge you will need – each bundle of asphalt tiles has 21 lineal meters of the starter course. (I will go into detail later.
Calculation number 3 will tell you how many bundles of asphalt tiles you will need for the hips. Each pack of asphalt tiles covers 8.8 linear meters of hips (or ridge).
TIP “The plywood used is 12mm Structural A-bond d-face d-face tongue & groove plywood AS-NZS 2004 – 2400mm x 1200mm. AUSTRALIAN MADE”
A list of tools used to build this DIY outdoor gazebo roof
Hammer, Measuring tape, chalk line, spirit level, Long straight edge, Hook blade knife, Compressor with framing gun (not necessary), circular saw set to 17mm deep cut, 15-20mm shank galvanised clout nails with a 10mm head, essential blade knife, two power cords, tin snips.
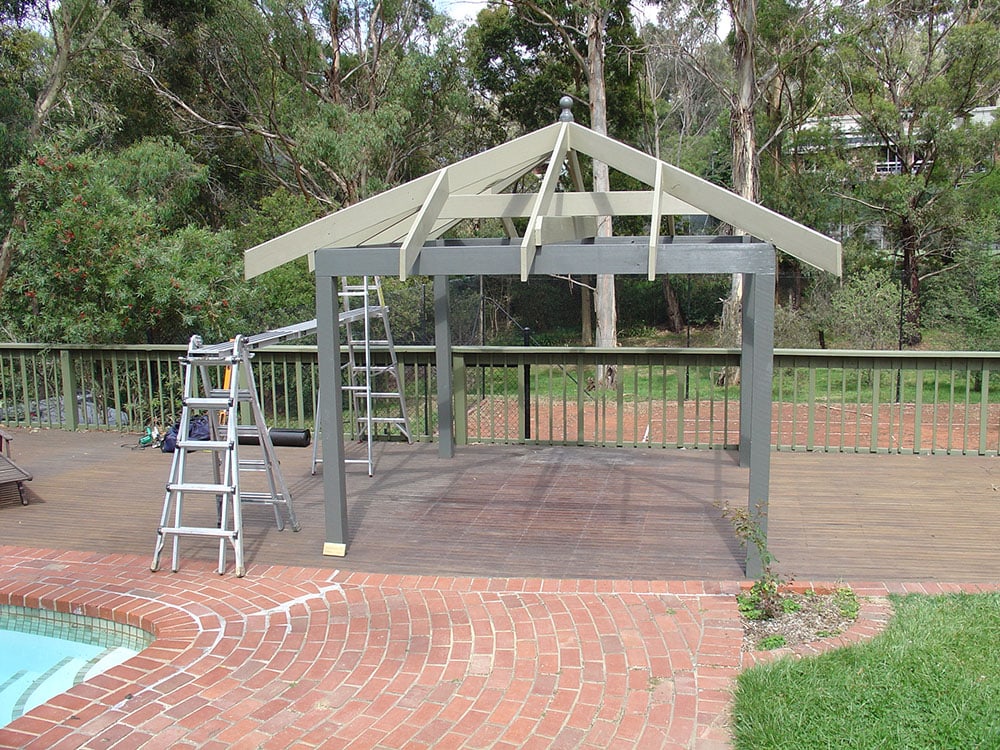
At this early point, you will have to run a straight edge over the rafters to check that they are all level.
If they are not, you will need to use a planer to take some off the tops of the rafters. Asphalt shingles are very low-profile and flat, so you will easily see any difference in rafter height in the finished roof.
TIP “The rafters for this Outdoor Gazebo were spaced at approximately 680mm centres. It is much better to space the rafters at 600mm centres (centre point from rafter to rafter), so you maximise the use of the plywood and have less cutting”.
Here, I have set up a basic plank between two ladders, which is usually more than adequate for an outdoor gazebo job like this.
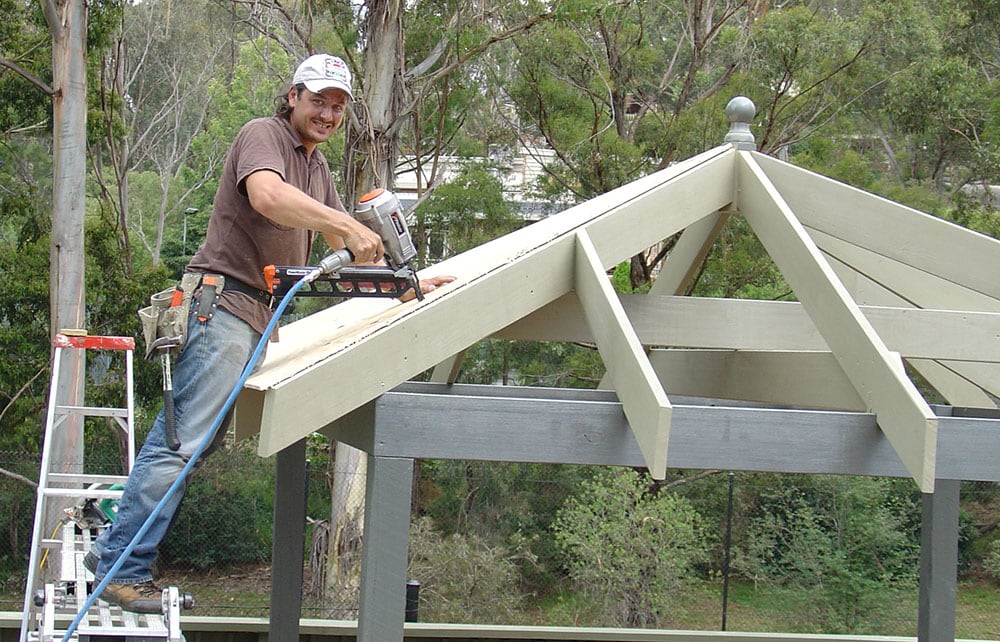
Pitch
This roof had a 25-degree roof pitch. The minimum slope for asphalt shingles is 9.5°. Between 9.5° pitch and 18.5° pitch, you will need to use a particular waterproofing barrier. An adhesive-backed rubberised membrane roll. It is also acceptable to use a double layer of Premium synthetic roof underlay. Between 60° pitch and vertical (steep-slope), you will need to self-seal each asphalt shingle tab.
TIP: “Both on steep slopes and in high wind areas, you should place a small dab of tar under each corner of each tab. This will prevent blow off.”

I am checking that the plywood aligns with the outside edge of the Fascia board. I am spanning the plywood horizontally along the long side, as per the manufacturer’s guidelines. Always try to stagger the sheets of plywood for extra strength.
TIP “Butt the tongue and groove end of the plywood tight together, but on the short sides, leave a 2 – 3mm gap to allow for any expansion the plywood may have.”
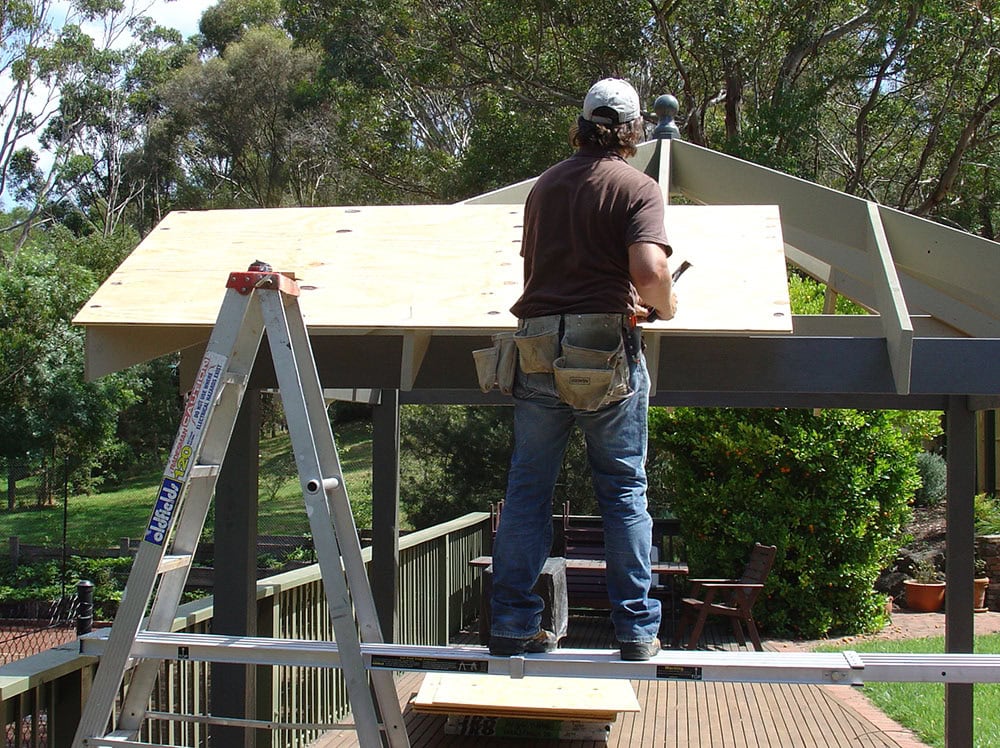
Once you have the first sheet of plywood in place, you can hammer a couple of nails to hold it in place. Don’t beat the nails where you are likely to cut the ply, e.g. on an end rafter or down the hip.
TIP “Plywood will generally have a stamp on one side with ‘A-Bond AS/NZS 2004….’ Lay this side facing up with all sheets for a clean underside and easier joining”.
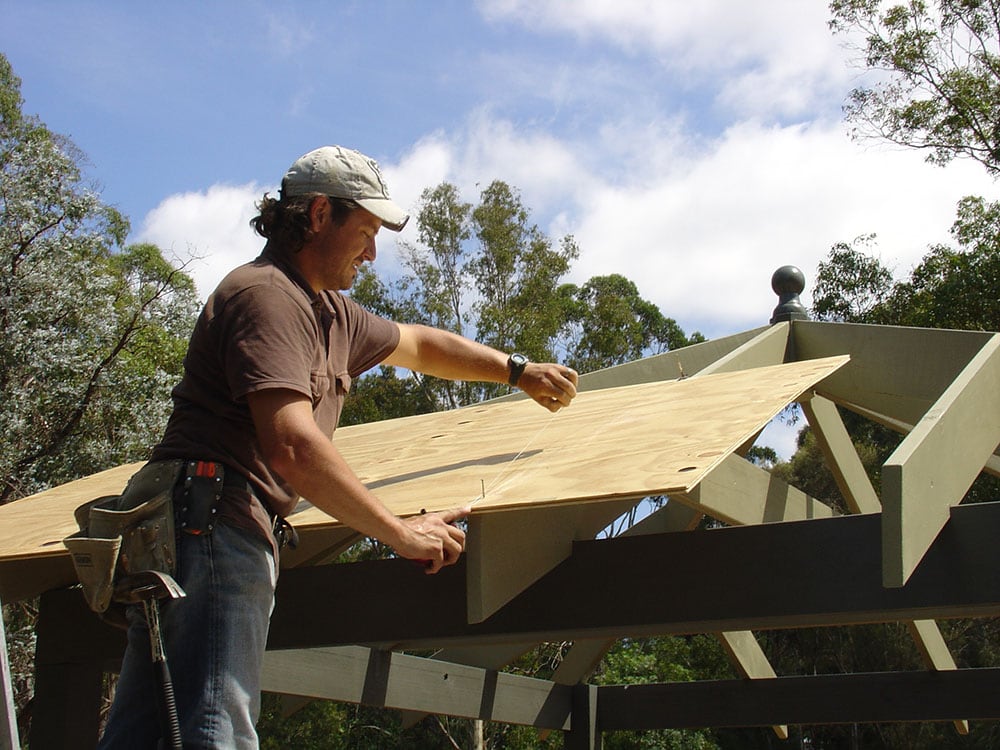
Here I am snapping a chalk line on the centre of the rafter for a clean, straight cut. At this point, measure the blade on your circular saw to cut precisely to the depth of the plywood to avoid mistakes.
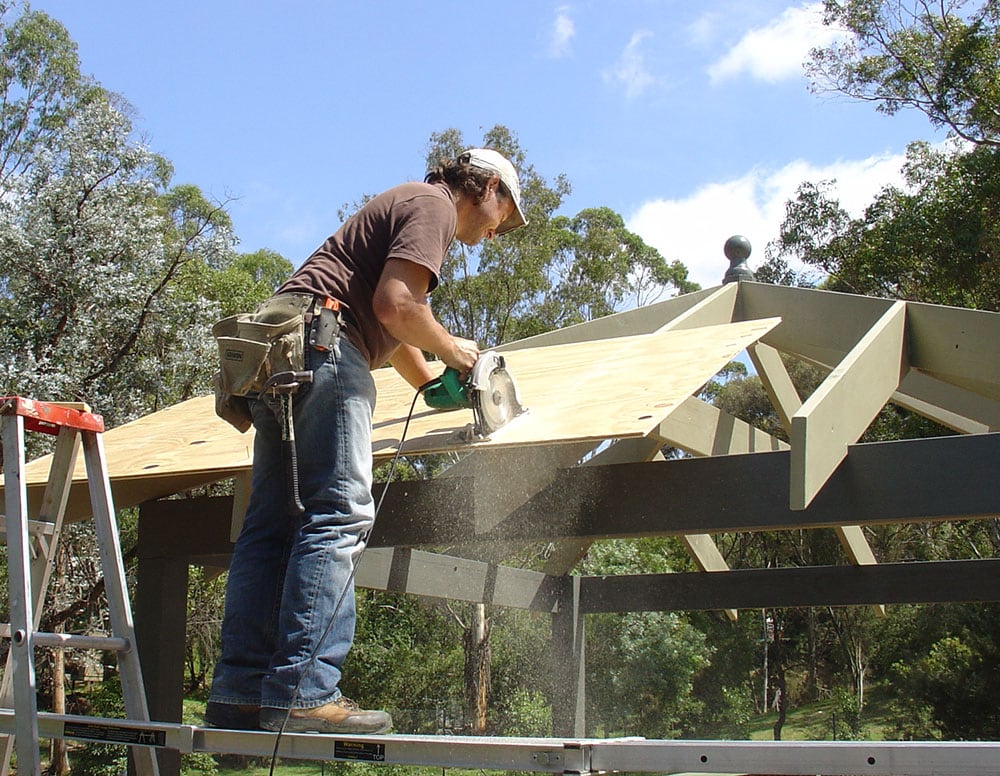
Cut straight up the chalk line. Some of the waterproofing chemicals in plywood are known to cause cancer, so be sure to use an essential mask. Here I’m holding my breath – I think!!
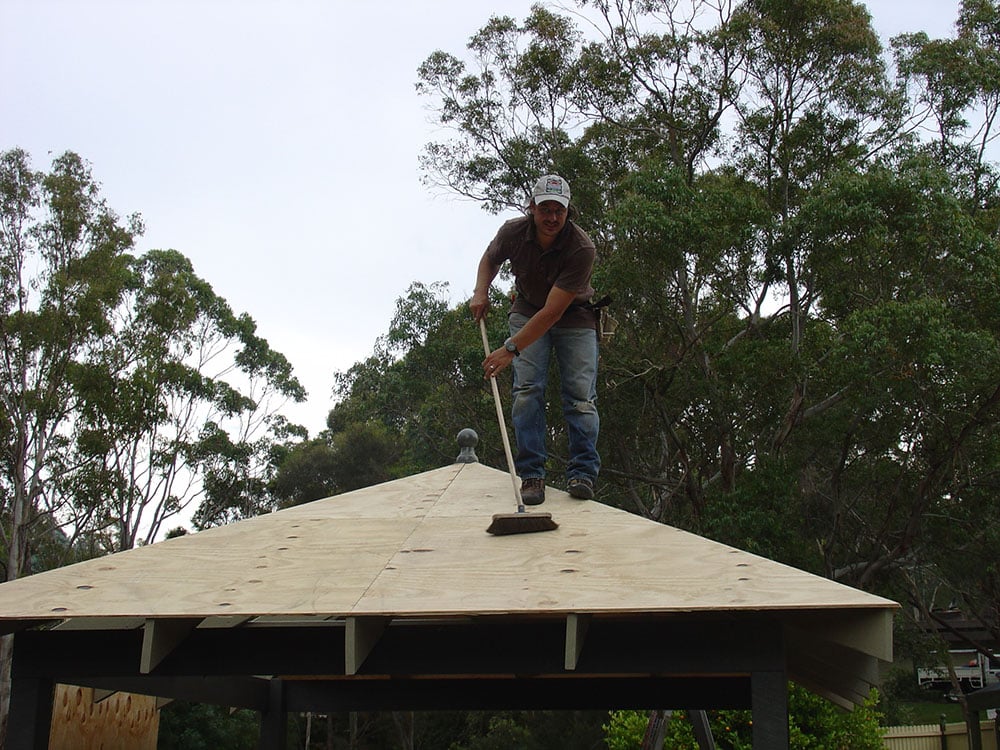
Sawdust on the plywood is very slippery, so keep it clean. As you can see, we are creating a fantastic deck that you can walk on as much as you like—no denting metal or cracking tiles on this outdoor pavilion.
Click here to go to Patio Roofing Install Guide PART 2